API Guide: Public vs Private Endpoints
Understanding Public & Private Binance API Endpoints
The Binance API provides both public and private endpoints, each serving different purposes.
Public Endpoints
- ✅ No authentication required
- ✅ Provides real-time market data
- ✅ Fetching current price trends
Private Endpoints
- 🔒 Requires authentication (API Key & Secret Key)
- 🔒 Allows access to user-specific data (balances, trade history)
- 🔒 Enables order execution and trade automation
Our Binance API Dashboard uses only public endpoints, meaning users do not need to register or provide an API key. However, if you want to access account-related data, you will need to generate an API key. You can learn how below.
Process Overview for Private API Access
Register on Binance → Create an account
Generate an API Key → Found in Binance API Management
Add API Key to Your Code → Securely update script.js
Authenticate API Requests → Use API Key to fetch private data
Step 1: Register on Binance
- Visit the Binance website.
- Click on Sign Up and create an account.
- Verify your email and complete any required KYC verification.
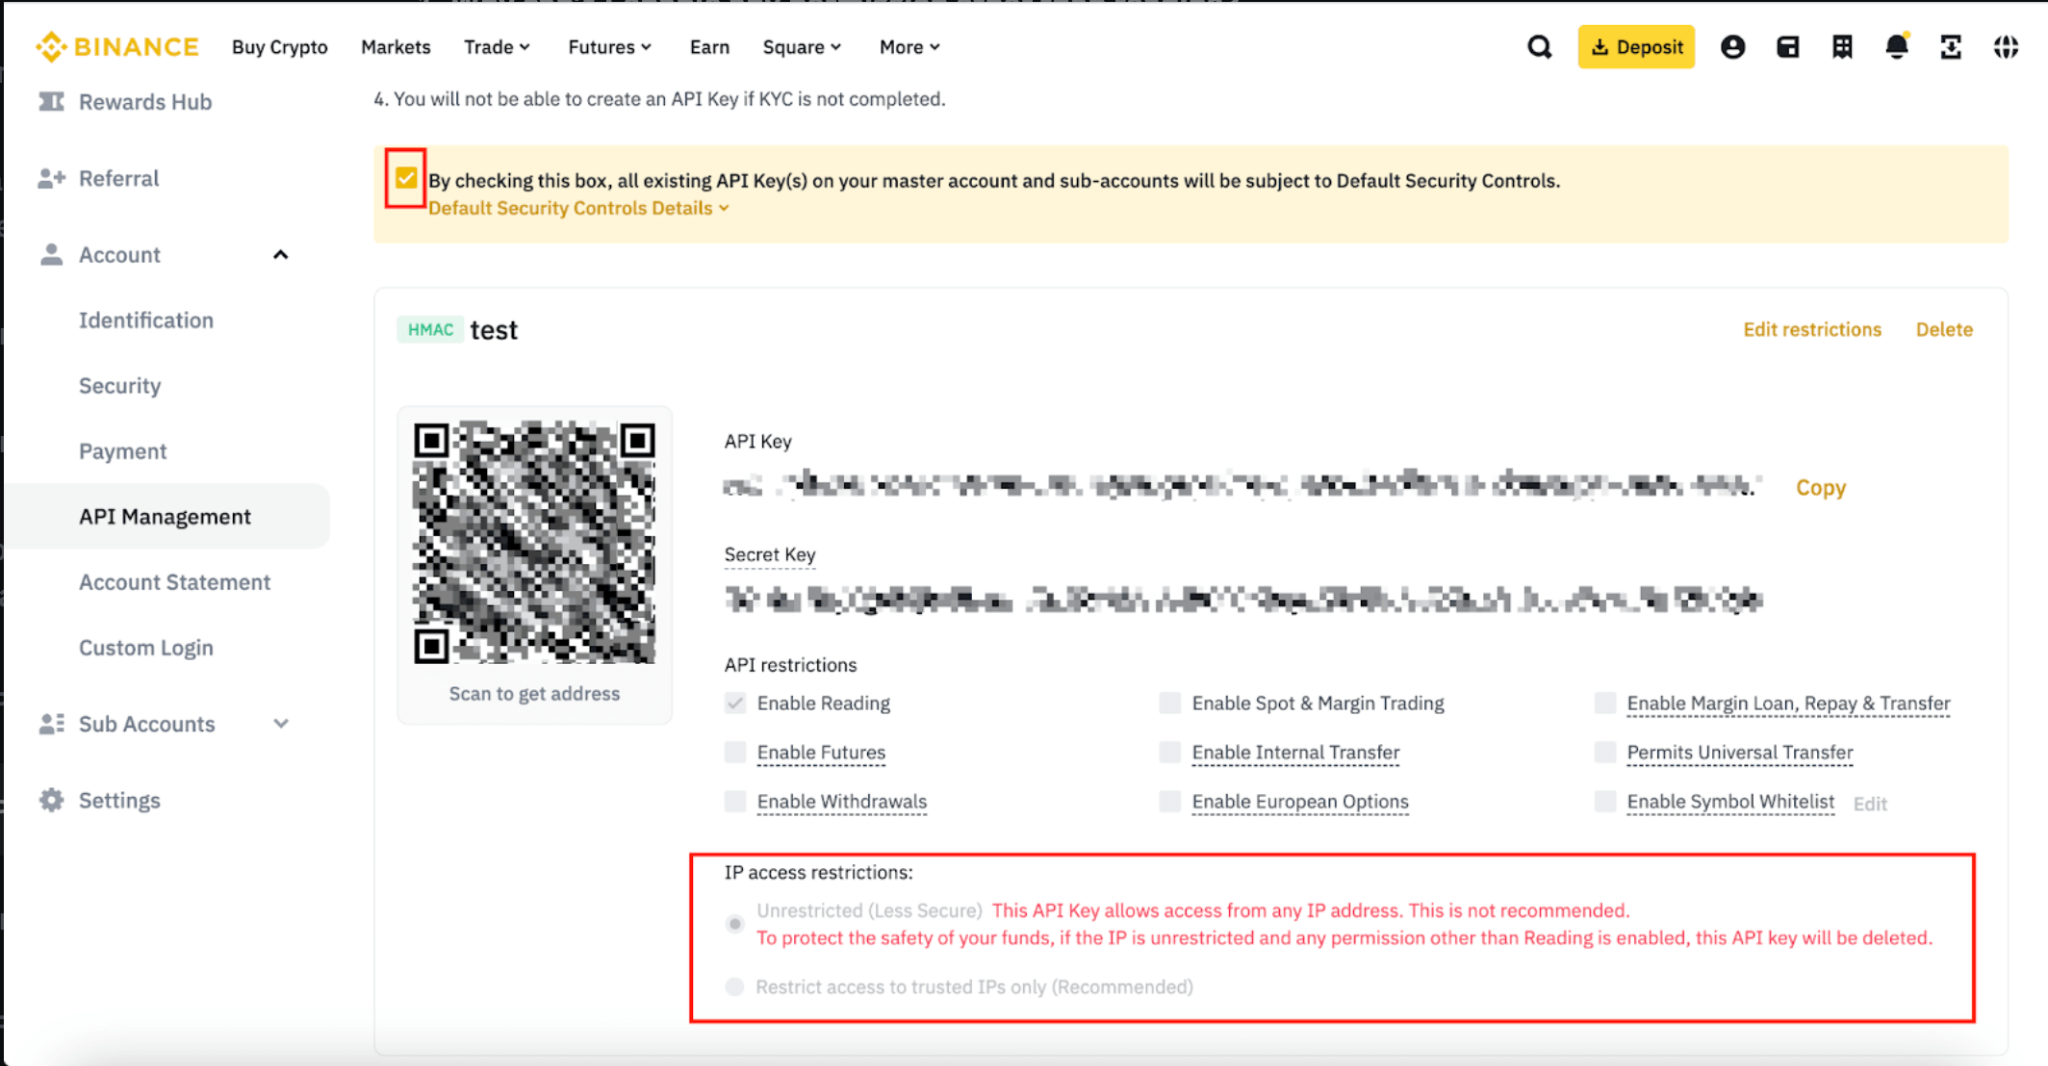
Step 2: Generate an API Key
- Log in to Binance and go to API Management.
- Click Create API and give it a name (e.g., "DashboardAccess").
- Enable the following permissions:
- ✔️ Read-Only (for retrieving account balances and trade history)
- ✔️ Trading Access (only if placing orders via API)
- Complete the security verification process and save your **API Key** and **Secret Key** securely.
Step 3: Using Your API Key in the Dashboard
- Open script.js in your project.
- Update the API URL if needed:
- To make requests using a private endpoint, include your API Key in the request headers:
- Save your changes and refresh the dashboard.
const BINANCE_API_URL = "https://api.binance.com/api/v3/ticker/price";
const response = await fetch("https://api.binance.com/api/v3/account", {
  headers: {
    "X-MBX-APIKEY": "your-api-key-here",
  },
});
FAQ and Troubleshooting
-
Issue: API key not working.
Solution: Ensure your API key has proper permissions or check IP restrictions. -
Issue: Dashboard not displaying private data.
Solution: Confirm that you're using a **private endpoint** and your API key is included correctly.